

In this tutorial, you’ll deploy Vaultwarden on a Raff Ubuntu 24.04 VM with Docker Compose, Caddy automatic HTTPS, public signup lock-down, and a first backup.
Vaultwarden is a Bitwarden-compatible self-hosted password manager. This tutorial covers deploying Vaultwarden on Ubuntu 24.04 with Docker Compose, placing it behind HTTPS, creating the first account, disabling public registration, and verifying the service before storing real credentials.
Raff Technologies runs over 10,000 VMs across its compute platform in Vint Hill, Virginia, on AMD EPYC hardware with NVMe storage.
⚠️ Warning: A password manager is security-critical infrastructure. Do not store real passwords until HTTPS is active, public registration is disabled, and you have created at least one backup.
Prerequisites:
- A Raff Ubuntu 24.04 VM
- SSH access with sudo privileges
- A domain or subdomain pointing to your Raff VM, for example
vault.example.com - Ports
80/tcpand443/tcpopen for HTTPS certificate issuance and web access
This tutorial was tested on a Raff VM with 2 vCPU, 4 GB DDR5 RAM, 40 GB NVMe storage, running Ubuntu 24.04.4 LTS.
Tested on Raff infrastructure by Aybars Altınyay, platform engineer and technical writer at Raff Technologies.
Step 1 — Update the Ubuntu server
Update the package index and install the base utilities used in this tutorial.
sudo apt update
sudo apt upgrade -y
sudo apt install -y ca-certificates curl gnupg lsb-release ufw dnsutils
📌 Note: If Ubuntu asks what to do with the modified
/etc/ssh/sshd_configfile during the upgrade, select keep the local version currently installed. This preserves the current SSH login configuration on the Raff VM.
Verify the server is running Ubuntu 24.04:
lsb_release -ds
Expected output:
Ubuntu 24.04.4 LTS
Step 2 — Install Docker and Compose
Install Docker Engine and the Docker Compose plugin from Docker’s official Ubuntu repository.
sudo install -m 0755 -d /etc/apt/keyrings

sudo curl -fsSL https://download.docker.com/linux/ubuntu/gpg \
  -o /etc/apt/keyrings/docker.asc

sudo chmod a+r /etc/apt/keyrings/docker.asc

sudo tee /etc/apt/sources.list.d/docker.sources > /dev/null <<EOF
Types: deb
URIs: https://download.docker.com/linux/ubuntu
Suites: $(. /etc/os-release && echo "${UBUNTU_CODENAME:-$VERSION_CODENAME}")
Components: stable
Architectures: $(dpkg --print-architecture)
Signed-By: /etc/apt/keyrings/docker.asc
EOF

sudo apt update

sudo apt install -y docker-ce docker-ce-cli containerd.io docker-buildx-plugin docker-compose-plugin
Verify Docker and Docker Compose are installed:
sudo docker run --rm hello-world
docker compose version
Expected output includes:
Hello from Docker!
Docker Compose version v5.1.3
Step 3 — Configure DNS and firewall rules
Set your Vaultwarden domain and verify it resolves to your Raff VM before starting Caddy.
read -rp "Vaultwarden domain, for example vault.example.com: " DOMAIN
read -rp "ACME email, for example admin@example.com: " EMAIL

dig +short "$DOMAIN"
Expected output:
your.raff.vm.ip.address
📌 Note: Use your own domain or subdomain for production. Temporary wildcard DNS services such as
sslip.ioornip.iocan hit shared Let’s Encrypt rate limits and are only suitable for testing.
Enable the firewall and allow only SSH, HTTP, and HTTPS:
sudo ufw allow OpenSSH
sudo ufw allow 80/tcp
sudo ufw allow 443/tcp
sudo ufw --force enable
sudo ufw status numbered
Expected output includes:
Status: active
[ 1] OpenSSH                    ALLOW IN    Anywhere
[ 2] 80/tcp                     ALLOW IN    Anywhere
[ 3] 443/tcp                    ALLOW IN    Anywhere
📌 Note: Vaultwarden itself will not expose a public host port. Only Caddy listens on ports
80and443.
Step 4 — Create the Vaultwarden Compose stack
Create the deployment directory and store the domain values for Docker Compose.
sudo mkdir -p /opt/vaultwarden
sudo chown -R "$USER":"$USER" /opt/vaultwarden
cd /opt/vaultwarden

cat > .env <<EOF
DOMAIN=$DOMAIN
EMAIL=$EMAIL
EOF
Create the Docker Compose file:
cat > compose.yaml <<'EOF'
services:
  vaultwarden:
    image: vaultwarden/server:latest
    container_name: vaultwarden
    restart: unless-stopped
    environment:
      DOMAIN: "https://${DOMAIN}"
      SIGNUPS_ALLOWED: "true"
      INVITATIONS_ALLOWED: "false"
      SHOW_PASSWORD_HINT: "false"
      IP_HEADER: "X-Real-IP"
      LOG_LEVEL: "warn"
      TZ: "Etc/UTC"
    volumes:
      - ./vw-data:/data
    networks:
      - vaultwarden_net

  caddy:
    image: caddy:2
    container_name: vaultwarden-caddy
    restart: unless-stopped
    depends_on:
      - vaultwarden
    ports:
      - "80:80"
      - "443:443"
    environment:
      DOMAIN: "${DOMAIN}"
      EMAIL: "${EMAIL}"
      LOG_FILE: "/data/access.log"
    volumes:
      - ./Caddyfile:/etc/caddy/Caddyfile:ro
      - caddy_data:/data
      - caddy_config:/config
    networks:
      - vaultwarden_net

networks:
  vaultwarden_net:
    driver: bridge

volumes:
  caddy_data:
  caddy_config:
EOF
Create the Caddy reverse proxy configuration:
cat > Caddyfile <<'EOF'
{$DOMAIN} {
  log {
    level INFO
    output file {$LOG_FILE} {
      roll_size 10MB
      roll_keep 10
    }
  }

  encode zstd gzip

  header {
    Strict-Transport-Security "max-age=31536000"
    X-Content-Type-Options "nosniff"
    X-Frame-Options "SAMEORIGIN"
    Referrer-Policy "no-referrer"
    -Server
  }

  reverse_proxy vaultwarden:80 {
    header_up X-Real-IP {remote_host}
  }
}
EOF
Validate the Compose configuration:
sudo docker compose config >/dev/null && echo "Compose config is valid"
Expected output:
Compose config is valid
Step 5 — Start Vaultwarden and Caddy
Start the Vaultwarden stack in detached mode.
cd /opt/vaultwarden
sudo docker compose up -d
Verify both containers are running:
sudo docker compose ps
Expected output includes:
NAME                 SERVICE       STATUS
vaultwarden          vaultwarden   Up
vaultwarden-caddy    caddy         Up
Verify HTTPS is active:
DOMAIN=$(grep '^DOMAIN=' /opt/vaultwarden/.env | cut -d= -f2)
curl -I "https://$DOMAIN"
Expected output begins with:
HTTP/2 200
Step 6 — Create the first Vaultwarden account
Open your Vaultwarden URL in a browser.
echo "https://$(grep '^DOMAIN=' /opt/vaultwarden/.env | cut -d= -f2)"
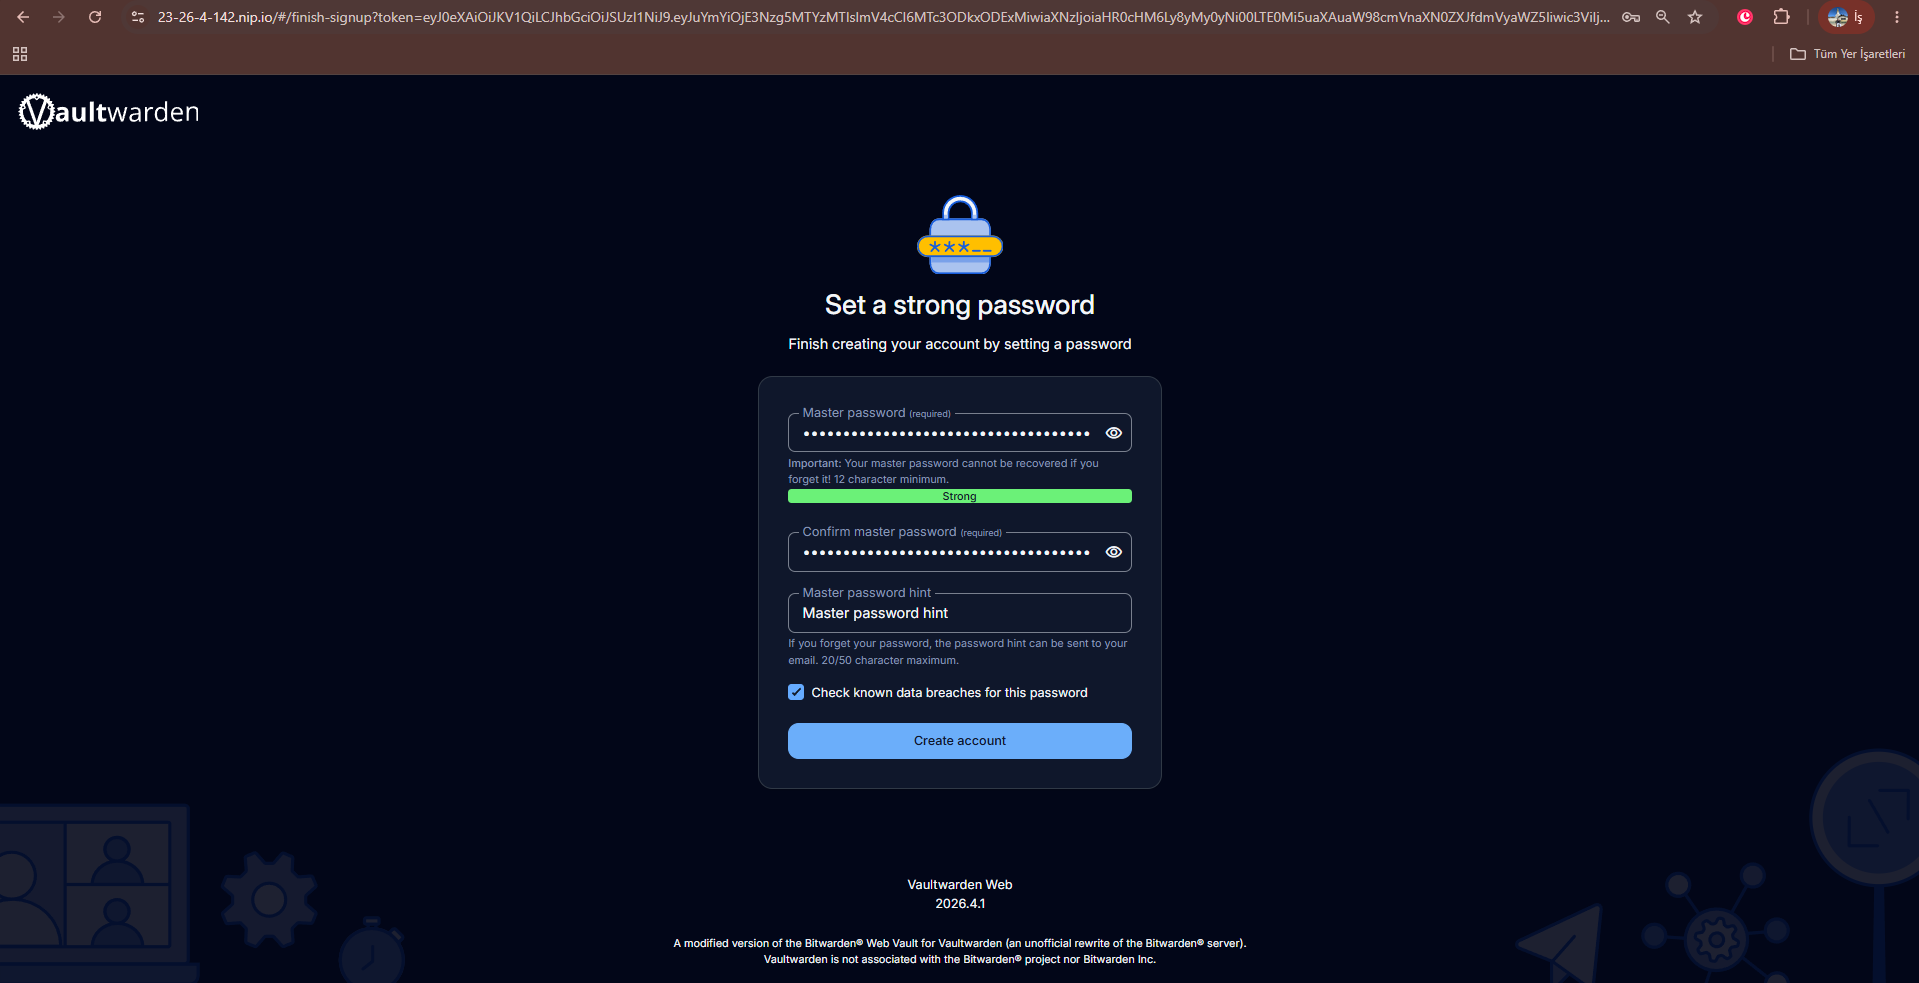
Create the first account from the web vault registration page.
Use a strong master password and store your recovery code immediately after account creation.
⚠️ Warning: The master password cannot be recovered from the server in this setup. If the master password and recovery code are lost, the vault data cannot be restored into a readable form.
Visible state check:
The browser shows the Vaultwarden web vault.
You can create the first account.
You can log in with the new account.
Step 7 — Disable public registration
After the first account exists, disable public signup so strangers cannot create accounts on the password manager.
cd /opt/vaultwarden

sudo sed -i 's/SIGNUPS_ALLOWED: "true"/SIGNUPS_ALLOWED: "false"/' compose.yaml

sudo docker compose up -d
Verify the running container has registration disabled:
sudo docker compose exec vaultwarden printenv SIGNUPS_ALLOWED
Expected output:
false
⚠️ Warning: Keep public registration disabled unless you are actively creating a controlled user account. Re-enable it only for the time needed, then set it back to
false.
Step 8 — Create the first data backup
Create a first backup before storing real passwords.
cd /opt/vaultwarden

sudo mkdir -p /opt/vaultwarden/backups

sudo docker compose stop vaultwarden

sudo tar -czf "/opt/vaultwarden/backups/vaultwarden-$(date +%F-%H%M).tar.gz" \
  vw-data compose.yaml Caddyfile .env

sudo docker compose start vaultwarden
Verify the backup archive exists:
sudo ls -lh /opt/vaultwarden/backups/
Expected output includes:
vaultwarden-YYYY-MM-DD-HHMM.tar.gz
⚠️ Warning: Store Vaultwarden backups off-server. The vault contents are encrypted by user master passwords, but the backup still contains sensitive service data and configuration.
Step 9 — Verify the complete Vaultwarden deployment
Verify HTTPS, container health, signup lock-down, and web vault login before using Vaultwarden for real credentials.
cd /opt/vaultwarden

DOMAIN=$(grep '^DOMAIN=' /opt/vaultwarden/.env | cut -d= -f2)

echo "Checking HTTPS:"
curl -I "https://$DOMAIN" | sed -n '1,8p'

echo "Checking containers:"
sudo docker compose ps

echo "Checking signup lock:"
sudo docker compose exec vaultwarden printenv SIGNUPS_ALLOWED
Expected output includes:
HTTP/2 200
vaultwarden          Up
vaultwarden-caddy    Up
false
Verify the admin panel is disabled:
curl -s "https://$DOMAIN/admin" | grep -i "admin" | head -n 5
Expected output includes:
The admin panel is disabled, please configure the 'ADMIN_TOKEN' variable to enable it.
Complete the browser verification:
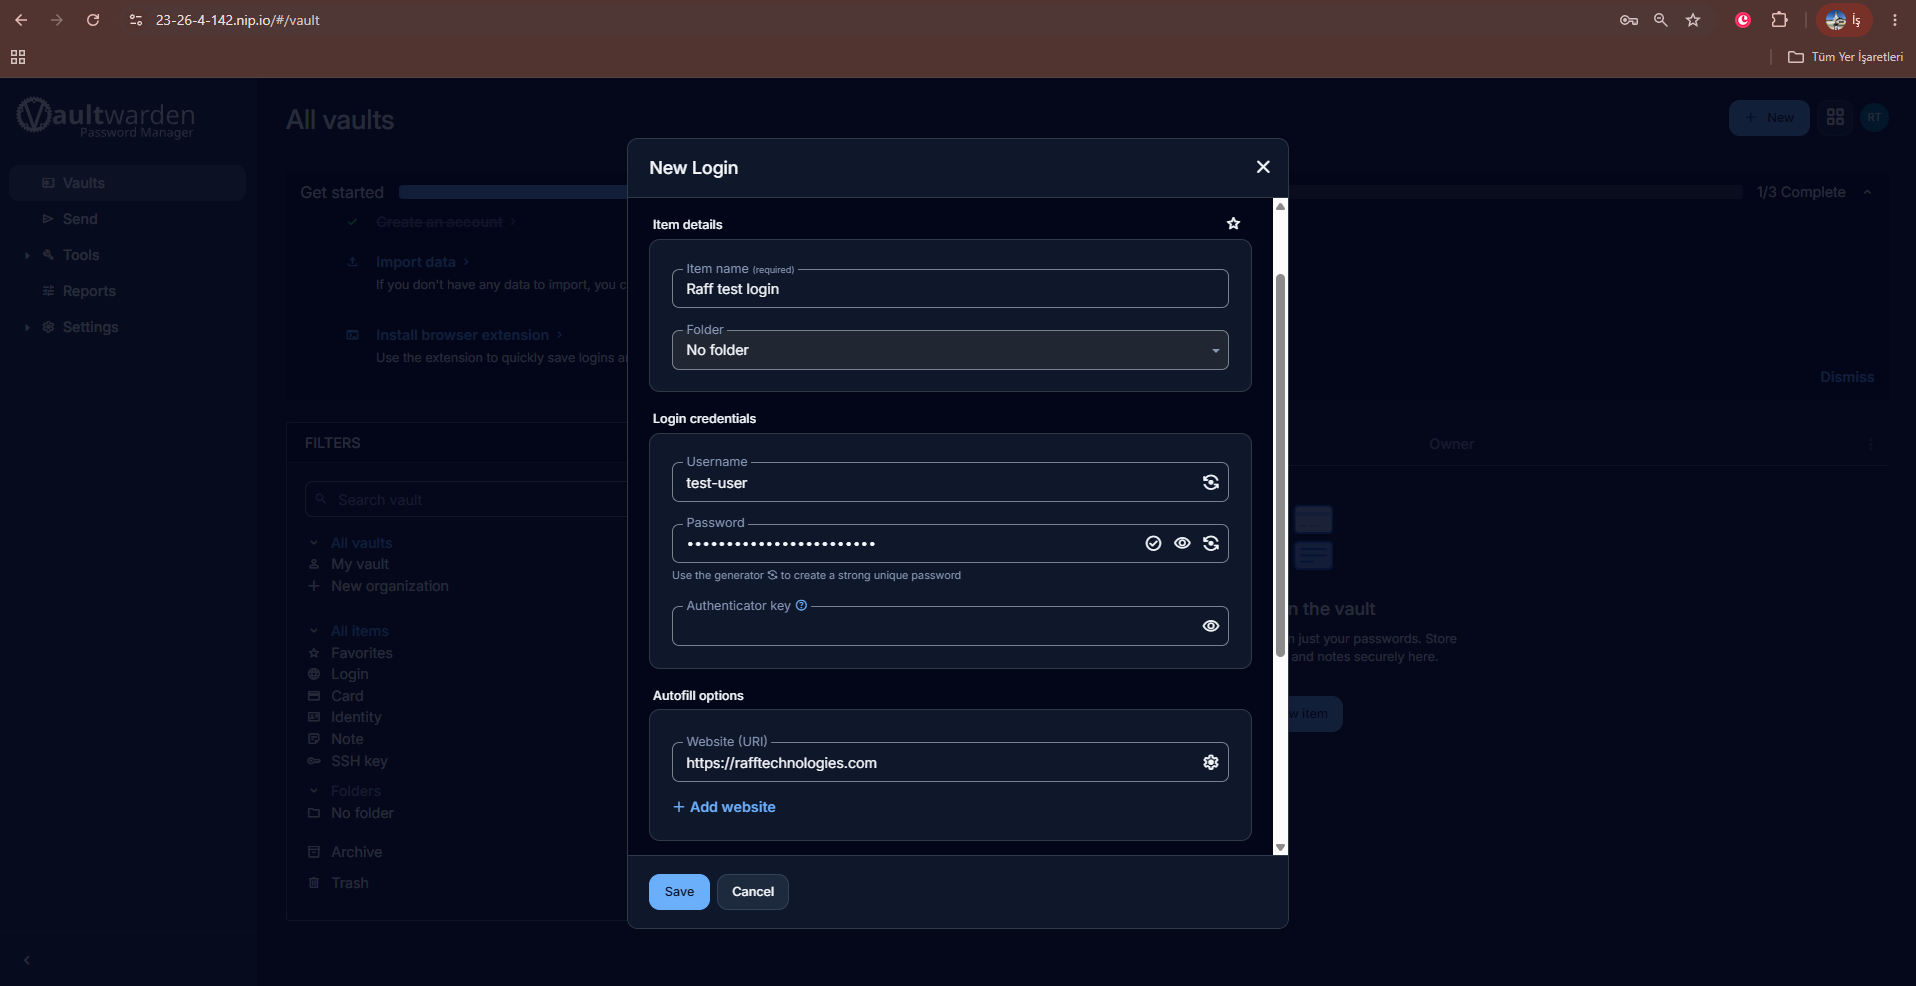
1. Log in at https://your-vaultwarden-domain.
2. Create a test login item named Raff test login.
3. Save the test login item.
4. Log out.
5. Log back in.
6. Confirm the Raff test login item is visible.
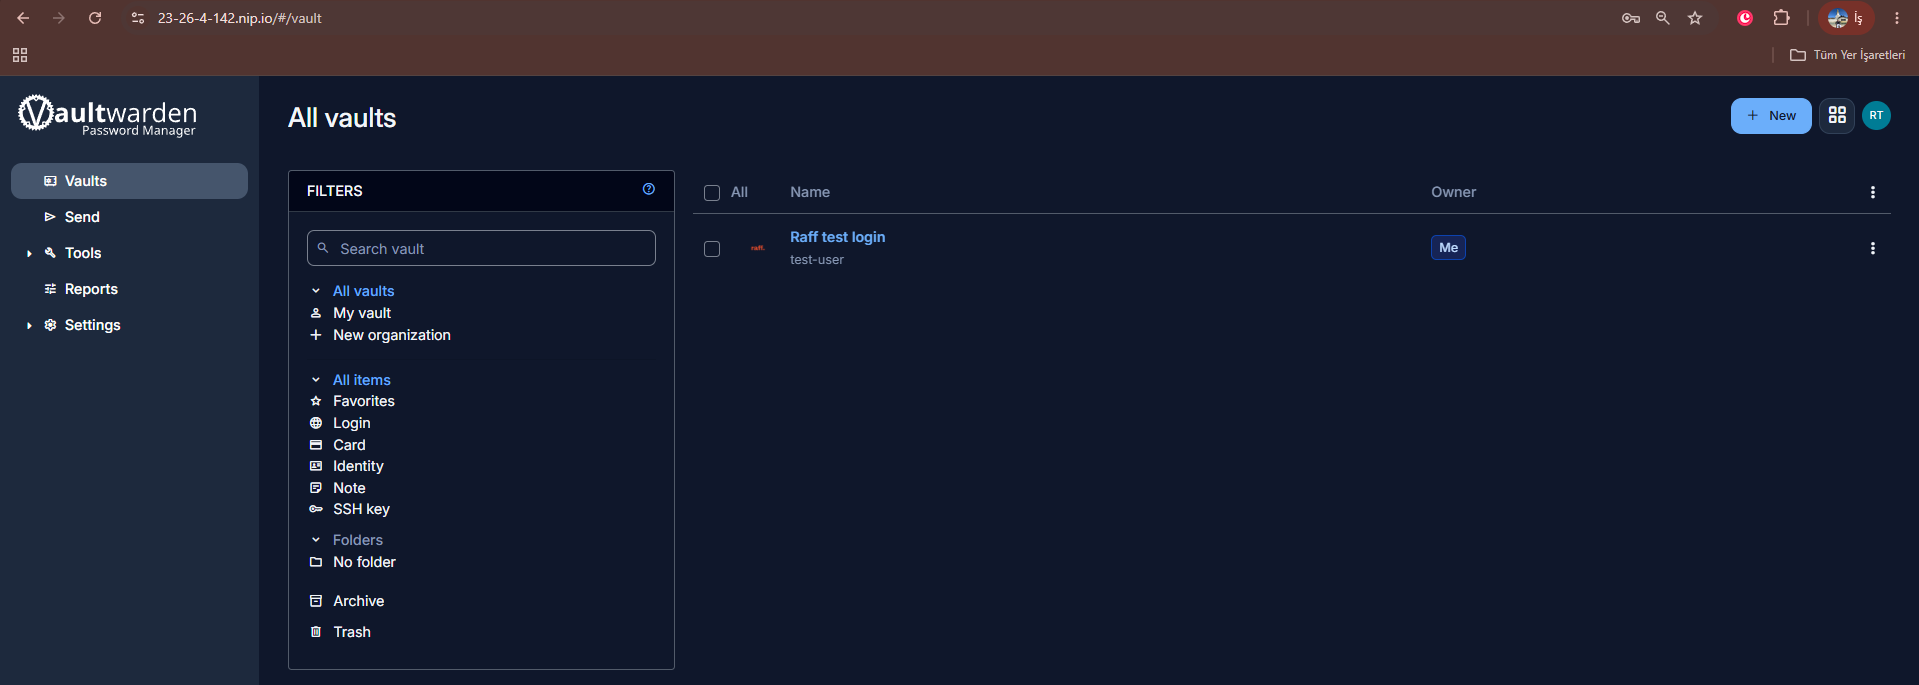
The Vaultwarden deployment is complete when HTTPS works, the first account can log in, public registration is disabled, the admin panel is disabled, a backup archive exists, and the saved test login remains visible after logging out and back in.
Cleanup (Optional)
Use this section only if you want to remove Vaultwarden from the Raff VM.
⚠️ Warning: The following commands permanently delete the Vaultwarden containers, Caddy certificate storage, configuration files, and vault data from this VM. Back up anything you need before proceeding.
cd /opt/vaultwarden

sudo docker compose down -v

sudo rm -rf /opt/vaultwarden
Close the firewall ports if this VM no longer hosts public web services:
sudo ufw delete allow 80/tcp
sudo ufw delete allow 443/tcp
sudo ufw status numbered
Expected output no longer lists 80/tcp or 443/tcp rules.
Troubleshooting
HTTPS certificate issuance fails
Cause: The domain does not point to the Raff VM, ports 80/tcp and 443/tcp are blocked, or the domain is affected by a shared Let’s Encrypt rate limit.
Fix:
DOMAIN=$(grep '^DOMAIN=' /opt/vaultwarden/.env | cut -d= -f2)

dig +short "$DOMAIN"
sudo ufw status numbered
sudo docker compose logs --tail=100 caddy
The DNS output must show the Raff VM public IP. The firewall output must allow 80/tcp and 443/tcp.
If the logs mention a certificate rate limit for a temporary wildcard DNS domain, switch to your own domain or subdomain.
Vaultwarden shows a blank page or 502 error
Cause: Caddy is running, but the Vaultwarden container is not reachable on the Docker network.
Fix:
cd /opt/vaultwarden

sudo docker compose ps
sudo docker compose logs --tail=100 vaultwarden
sudo docker compose restart vaultwarden caddy
Expected output from sudo docker compose ps shows both containers as Up.
Public registration was disabled before creating the first account
Cause: SIGNUPS_ALLOWED was changed to false before the first user was created.
Fix:
cd /opt/vaultwarden

sudo sed -i 's/SIGNUPS_ALLOWED: "false"/SIGNUPS_ALLOWED: "true"/' compose.yaml
sudo docker compose up -d
Create the first account, then disable registration again:
sudo sed -i 's/SIGNUPS_ALLOWED: "true"/SIGNUPS_ALLOWED: "false"/' compose.yaml
sudo docker compose up -d
sudo docker compose exec vaultwarden printenv SIGNUPS_ALLOWED
Expected output:
false
The master password is lost
Cause: Vaultwarden cannot recover a user’s master password from the server.
Fix:
Use the account recovery code or restore from a known-good client export.
If neither exists, create a new vault and re-import credentials from another source.
This is why Step 8 creates a backup before storing real passwords.
Conclusion
You now have Vaultwarden running on a Raff Ubuntu 24.04 VM with Docker Compose, Caddy HTTPS, public registration disabled, the admin panel disabled, and a first backup archive created. If you haven’t deployed your Raff VM yet, you can spin one up in 60 seconds at rafftechnologies.com.
Next: Secure Nginx with Let’s Encrypt on Ubuntu 24.04
Related: Automate Server Backups with Cron and Rsync on Ubuntu 24.04
Guide: Cloud Server Backup Strategies