
In this tutorial, you’ll install Node.js 24 LTS and npm on a Raff Ubuntu 24.04 VM, verify the installation, install build tools, create a small test project, and run a temporary Node.js HTTP server.
Node.js is a JavaScript runtime used to build web servers, APIs, command-line tools, real-time applications, and backend services. This tutorial installs Node.js from the NodeSource repository so you can use the current Node.js 24 LTS release instead of the older version that may be available in Ubuntu’s default package repository.
Raff Technologies runs over 10,000 VMs across its compute platform in Vint Hill, Virginia, on AMD EPYC hardware with NVMe storage.
Prerequisites:
- A Raff Ubuntu 24.04 VM
- SSH access with sudo privileges
- Port
3000/tcptemporarily available for the test HTTP server - Basic familiarity with running commands in a Linux terminal
This tutorial was tested on a Raff VM with 2 vCPU, 4 GB RAM, running Ubuntu 24.04.4 LTS.
Tested on Raff infrastructure by Aybars Altınyay, platform engineer and technical writer at Raff Technologies.
Step 1 — Update Ubuntu and install prerequisites
Update the package index and install the base packages needed to add an external APT repository.
sudo apt update

sudo env DEBIAN_FRONTEND=noninteractive NEEDRESTART_MODE=a apt upgrade -y \
  -o Dpkg::Options::=--force-confdef \
  -o Dpkg::Options::=--force-confold

sudo apt install -y ca-certificates curl gnupg lsb-release ufw build-essential
📌 Note: If Ubuntu asks what to do with a modified
/etc/ssh/sshd_configfile, select keep the local version currently installed. This preserves your current SSH login configuration.
Verify the Ubuntu version:
lsb_release -ds
Expected output:
Ubuntu 24.04.4 LTS
Minor Ubuntu 24.04 point releases are acceptable.
Step 2 — Add the NodeSource Node.js 24 repository
Add the NodeSource setup script for Node.js 24.
curl -fsSL https://deb.nodesource.com/setup_24.x | sudo bash -
After the script finishes, update the package index again:
sudo apt update
Verify that APT can see the NodeSource Node.js package:
apt-cache policy nodejs | sed -n '1,12p'
Expected output includes a candidate version from NodeSource.
nodejs:
  Installed: (none)
  Candidate: 24.x.x
The exact version may change as Node.js 24 LTS receives updates.
Step 3 — Install Node.js and npm
Install Node.js.
sudo apt install -y nodejs
The NodeSource package includes Node.js and npm.
Verify the installed versions:
node -v
npm -v
Expected output from the tested Raff VM:
v24.16.0
11.3.0
Your exact patch versions may be newer.
Step 4 — Verify Node.js from the command line
Run a simple Node.js command:
node -e "console.log('Node.js is working on Raff')"
Expected output:
Node.js is working on Raff
Verify that npm can initialize a project:
mkdir -p /opt/nodejs-test
cd /opt/nodejs-test

npm init -y
Expected output includes:
Wrote to /opt/nodejs-test/package.json
Check that the project file exists:
ls -l package.json
Expected output includes:
package.json
Step 5 — Create a test Node.js HTTP server
Create a small HTTP server.
cd /opt/nodejs-test

cat > server.js <<'EOF'
const http = require('http');

const hostname = '0.0.0.0';
const port = 3000;

const server = http.createServer((req, res) => {
  res.statusCode = 200;
  res.setHeader('Content-Type', 'text/html; charset=utf-8');
  res.end(`
<!doctype html>
<html>
<head>
  <meta charset="utf-8">
  <title>Hello from Node.js on Raff</title>
  <style>
    body {
      font-family: Arial, sans-serif;
      background: #111;
      color: #fff;
      max-width: 760px;
      margin: 120px auto;
      line-height: 1.6;
    }
    h1 {
      color: #db4a2b;
    }
  </style>
</head>
<body>
  <h1>Hello from Node.js on Raff!</h1>
  <p>This page is served by a Node.js HTTP server running on an Ubuntu 24.04 VM.</p>
</body>
</html>
`);
});

server.listen(port, hostname, () => {
  console.log(`Node.js test server running at http://${hostname}:${port}/`);
});
EOF
Start the test server in the background:
nohup node server.js > node-server.log 2>&1 &
echo $! > node-server.pid
Verify that the server is listening on port 3000:
sudo ss -tulpn | grep ':3000'
Expected output includes:
LISTEN
0.0.0.0:3000
Step 6 — Verify Node.js with a test HTTP server
Allow temporary access to port 3000.
sudo ufw allow OpenSSH
sudo ufw allow 3000/tcp
sudo ufw --force enable
sudo ufw status numbered
Expected output includes:
Status: active
OpenSSH                    ALLOW IN
3000/tcp                   ALLOW IN
Test the server locally:
curl -I http://localhost:3000
curl -s http://localhost:3000 | grep "Hello from Node.js on Raff"
Expected output includes:
HTTP/1.1 200 OK
<h1>Hello from Node.js on Raff!</h1>
Find your VM’s public IP address:
curl -4 icanhazip.com
Open your browser and visit:
http://your_server_ip:3000
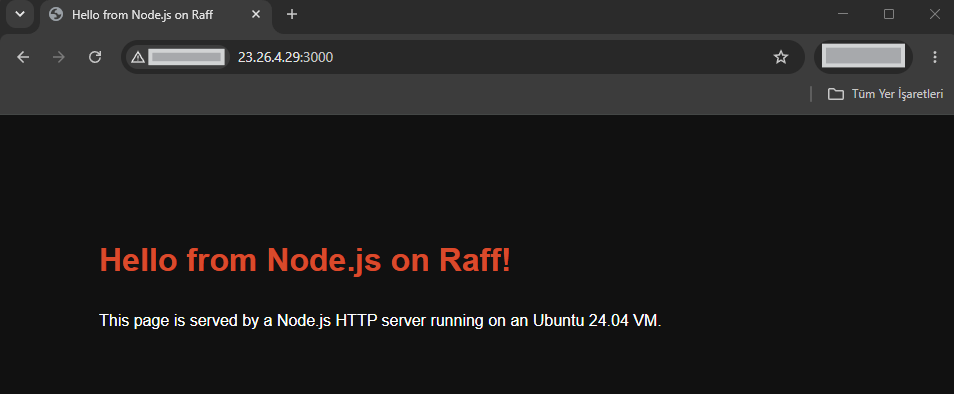
Visible state check:
The browser shows the message "Hello from Node.js on Raff!".
The URL uses http://your_server_ip:3000.
The Node.js server is running on the Raff Ubuntu 24.04 VM.
The test is successful when the browser displays the Node.js page and curl -I http://localhost:3000 returns HTTP/1.1 200 OK.
📌 Note: Port
3000is opened only for this temporary verification step. In production, place Node.js applications behind a reverse proxy such as Nginx or Caddy and serve traffic through ports80and443.
Step 7 — Review the installed Node.js environment
Check the final versions and project files:
node -v
npm -v

cd /opt/nodejs-test
ls -l
Expected output includes:
v24.x.x
11.x.x
package.json
server.js
node-server.log
Check the Node.js server process:
ps aux | grep '[n]ode server.js'
Expected output includes:
node server.js
Check the server log:
cat /opt/nodejs-test/node-server.log
Expected output includes:
Node.js test server running at http://0.0.0.0:3000/
Step 8 — Verify the complete Node.js setup
Run a final verification sequence:
echo "Checking Node.js:"
node -v

echo "Checking npm:"
npm -v

echo "Checking project file:"
test -f /opt/nodejs-test/package.json && echo "package.json exists"

echo "Checking HTTP server:"
curl -I http://localhost:3000

echo "Checking page content:"
curl -s http://localhost:3000 | grep "Hello from Node.js on Raff"

echo "Checking firewall:"
sudo ufw status numbered
Expected output includes:
v24.x.x
11.x.x
package.json exists
HTTP/1.1 200 OK
Hello from Node.js on Raff
3000/tcp ALLOW IN
The Node.js installation is complete when Node.js and npm return versions, the test project exists, and the test HTTP server responds successfully.
Cleanup (Optional)
Use this section to stop the temporary test server and close port 3000.
Stop the test server:
cd /opt/nodejs-test

if [ -f node-server.pid ]; then
  kill "$(cat node-server.pid)" 2>/dev/null || true
  rm -f node-server.pid
fi

sudo fuser -k 3000/tcp 2>/dev/null || true
Close the temporary firewall rule:
sudo ufw delete allow 3000/tcp
Verify that port 3000 is closed:
sudo ss -tulpn | grep ':3000' || echo "Port 3000 is closed"

curl -I --max-time 3 http://localhost:3000 || echo "Node.js test server is stopped"
Expected output:
Port 3000 is closed
Node.js test server is stopped
If you want to remove the test project files as well:
sudo rm -rf /opt/nodejs-test
📌 Note: Do not remove Node.js itself if you plan to use this VM for Node.js applications.
Troubleshooting
node: command not found
Cause: Node.js is not installed, or the package installation did not complete.
Fix:
apt-cache policy nodejs
sudo apt install -y nodejs
node -v
Expected output includes a Node.js version.
npm: command not found
Cause: npm is missing or Node.js was installed from a package source that does not include npm.
Fix:
sudo apt install -y nodejs
npm -v
The NodeSource Node.js package includes npm.
The browser cannot open port 3000
Cause: The Node.js server is not running, UFW blocks port 3000, or the wrong public IP address is being used.
Fix:
sudo ss -tulpn | grep ':3000'
sudo ufw status numbered
curl -4 icanhazip.com
curl -I http://localhost:3000
Expected output includes:
0.0.0.0:3000
3000/tcp ALLOW IN
HTTP/1.1 200 OK
EADDRINUSE: address already in use
Cause: Another process is already using port 3000.
Fix:
sudo ss -tulpn | grep ':3000'
sudo fuser -k 3000/tcp
Then restart the test server:
cd /opt/nodejs-test

nohup node server.js > node-server.log 2>&1 &
echo $! > node-server.pid
The page works locally but not from the browser
Cause: The server may be listening only on localhost, or the firewall may block external access.
Fix:
Check that server.js uses:
const hostname = '0.0.0.0';
Then verify the firewall:
sudo ufw allow 3000/tcp
sudo ufw status numbered
I should not expose port 3000 directly in production
Correct. Port 3000 is used only for this tutorial’s temporary verification step.
For production deployments, run the Node.js application on an internal port and place it behind a reverse proxy such as Nginx or Caddy. You can start with Install Nginx on Ubuntu 24.04, then configure HTTPS with a certificate before serving real users.
Conclusion
You have installed Node.js 24 LTS and npm on a Raff Ubuntu 24.04 VM, verified the command-line runtime, initialized a test project, and confirmed a Node.js HTTP server works in the browser.
From here, you can build APIs, run backend services, deploy full-stack JavaScript applications, or place your Node.js app behind Nginx for production traffic. If you haven’t deployed your Raff VM yet, you can create one from the Raff Linux VM page.
Next: Install Nginx on Ubuntu 24.04 Related: Install Docker on Ubuntu 24.04 Guide: Deploy Uptime Kuma with Docker on Ubuntu 24.04