
In this tutorial, you’ll install Nginx on Ubuntu 24.04, allow HTTP traffic through UFW, verify the default Nginx page, create a custom server block, inspect the logs, and run an end-to-end web server check.
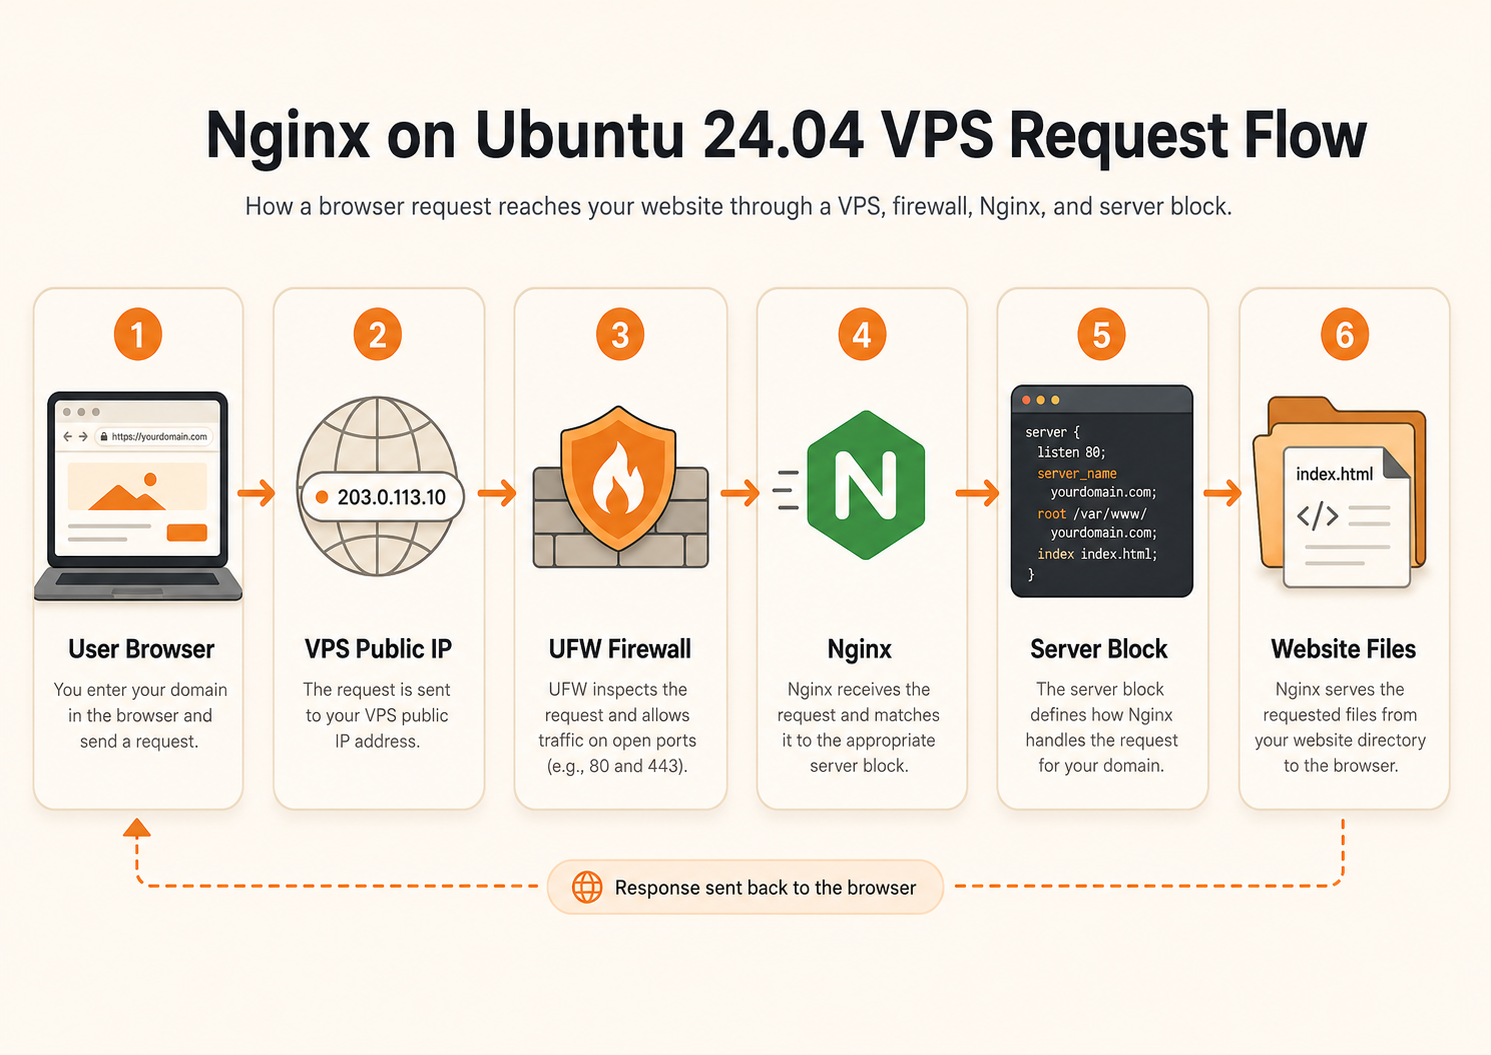
Nginx is a lightweight web server, reverse proxy, and load balancer commonly used in front of websites, APIs, application servers, and containerized workloads. Ubuntu 24.04 provides the Nginx 1.24 release branch through its default repositories and delivers security fixes through normal system updates.
Raff supports 3,000+ customers and 15,000+ VMs in its us-east region. Raff Linux VMs provide KVM virtualization, full root access, NVMe storage, and 3 Gbps unmetered bandwidth for web hosting and application traffic.
:::cluster cloud-networking-private-networks-load-balancing :::
Prerequisites:
- A Raff Linux VM running Ubuntu 24.04
- SSH access with a user that has sudo privileges
- The VM’s public IPv4 address
- Port
22/tcpavailable for SSH and port80/tcpavailable for the HTTP test - A domain is optional for this tutorial but required before enabling production HTTPS
The original workflow was tested on a Raff VM with 2 vCPU and 2 GB RAM. The commands and package behavior were reviewed against Canonical’s current Ubuntu 24.04 Nginx and firewall documentation in July 2026.
Step 1 — Update Ubuntu and install Nginx
Update the package index and install current security and package updates before exposing a web service:
sudo apt update
sudo apt upgrade -y
Install Nginx, UFW, and curl from Ubuntu’s default repositories:
sudo apt install -y nginx ufw curl
Canonical documents the same package installation method in its Ubuntu Server Nginx guide.
Verify the Ubuntu release and Nginx version:
lsb_release -ds
nginx -v 2>&1
Expected output includes:
Ubuntu 24.04
nginx version: nginx/1.24
The Ubuntu package revision may change as security and maintenance updates are published. Keep the server updated even when the upstream Nginx base version remains 1.24.
Step 2 — Verify the Nginx service
Nginx should start automatically after installation. Confirm that the service is active:
systemctl is-active nginx
Expected output:
active
Confirm that Nginx is enabled at boot:
systemctl is-enabled nginx
Expected output:
enabled
View the full service status without opening an interactive pager:
sudo systemctl status nginx --no-pager
Expected output includes:
Active: active (running)
Useful service commands:
sudo systemctl start nginx
sudo systemctl stop nginx
sudo systemctl restart nginx
sudo systemctl reload nginx
sudo systemctl enable nginx
Use reload after a successful configuration test when you want to apply changes without fully stopping the web server.
Step 3 — Configure the UFW firewall
UFW is Ubuntu’s host-based firewall management tool. Allow SSH before enabling it so you do not lock yourself out of the VM.
sudo ufw allow OpenSSH
If the OpenSSH application profile is unavailable, allow the SSH port directly:
sudo ufw allow 22/tcp
List the application profiles registered by Nginx:
sudo ufw app list
Expected output includes:
Nginx Full
Nginx HTTP
Nginx HTTPS
Allow HTTP traffic for this installation test:
sudo ufw allow 'Nginx HTTP'
Enable UFW:
sudo ufw --force enable
Verify the active rules:
sudo ufw status numbered
Expected output includes:
Status: active
OpenSSH                    ALLOW IN
Nginx HTTP                 ALLOW IN
⚠️ Warning: Always permit your current SSH access path before enabling UFW. If you also use an upstream cloud firewall, allow TCP port
80there for the public browser test.
Canonical’s Ubuntu firewall documentation explains UFW’s role and rule management in more detail.
Step 4 — Test the default Nginx page
Verify the web server locally first:
curl -I http://127.0.0.1
Expected output includes:
HTTP/1.1 200 OK
Server: nginx
Get the VM’s public IPv4 address from the Raff dashboard or run:
curl -4s https://icanhazip.com
Open the address in a browser:
http://your_server_ip
Visible state check:
The browser shows the default Nginx welcome page.
The page includes the message "Welcome to nginx!"
The browser uses HTTP because HTTPS is not configured yet.
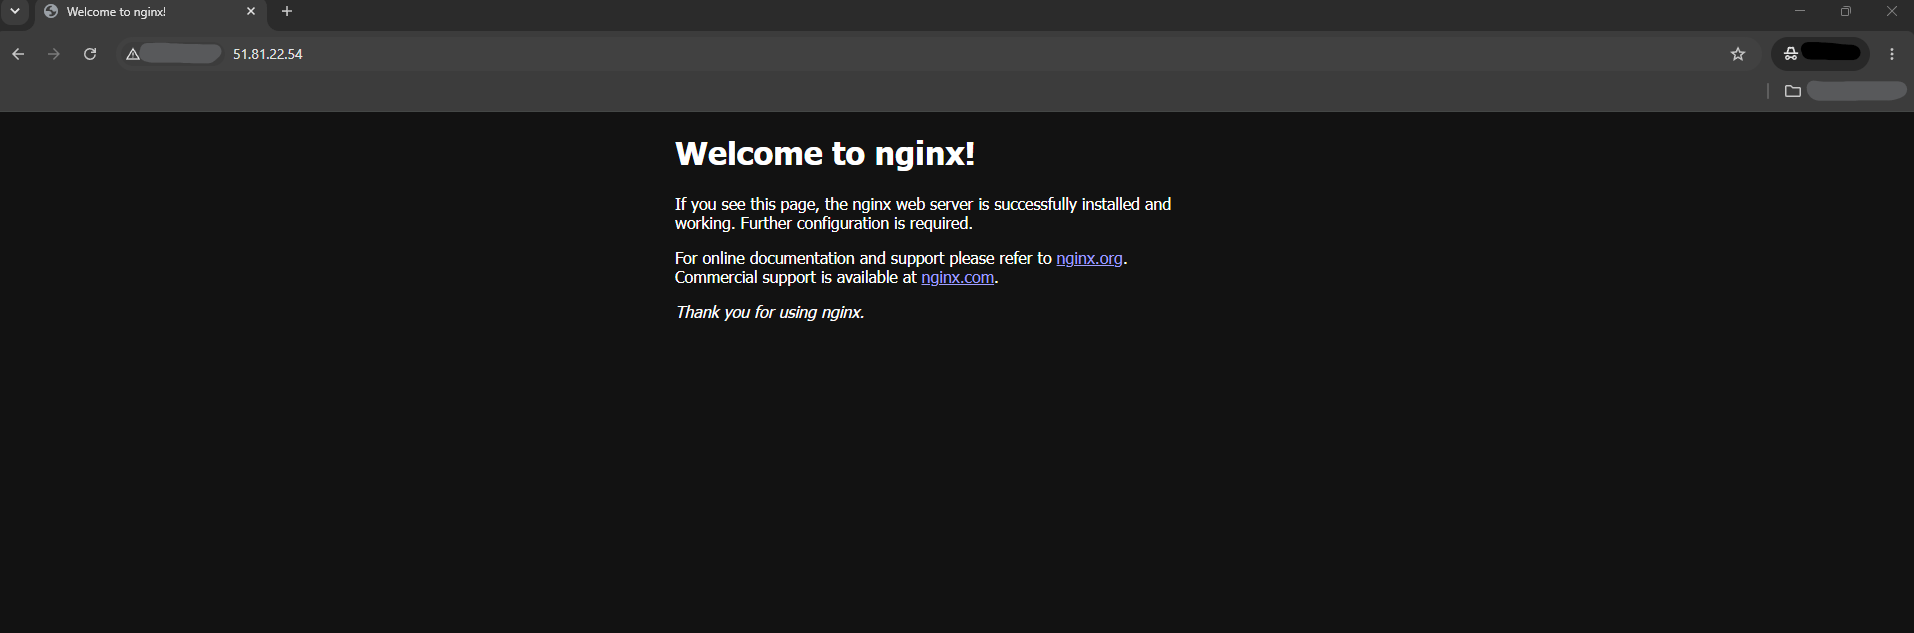
This confirms that Nginx is installed, the service is running, and HTTP traffic can reach the VM.
Step 5 — Create a custom Nginx server block
Nginx uses server blocks to select the site or application configuration for an incoming request. Ubuntu stores available site configurations in /etc/nginx/sites-available/ and enables them with symbolic links in /etc/nginx/sites-enabled/.
Create a document root for the demo site:
sudo mkdir -p /var/www/raff-nginx-demo/html
Create the custom HTML page:
sudo tee /var/www/raff-nginx-demo/html/index.html > /dev/null <<'EOF'
<!doctype html>
<html lang="en">
<head>
  <meta charset="utf-8">
  <meta name="viewport" content="width=device-width, initial-scale=1">
  <title>Nginx server block is working on Raff</title>
  <style>
    body {
      font-family: Arial, sans-serif;
      background: #111;
      color: #fff;
      max-width: 720px;
      margin: 120px auto;
      padding: 0 24px;
      line-height: 1.6;
    }
    h1 {
      color: #db4a2b;
    }
  </style>
</head>
<body>
  <h1>Nginx server block is working on Raff</h1>
  <p>This custom Nginx page is served from an Ubuntu 24.04 Linux VM.</p>
</body>
</html>
EOF
Create a server block for the demo site:
sudo tee /etc/nginx/sites-available/raff-nginx-demo > /dev/null <<'EOF'
server {
    listen 80 default_server;
    listen [::]:80 default_server;

    server_name _;

    root /var/www/raff-nginx-demo/html;
    index index.html;

    access_log /var/log/nginx/raff-nginx-demo.access.log;
    error_log /var/log/nginx/raff-nginx-demo.error.log;

    location / {
        try_files $uri $uri/ =404;
    }
}
EOF
Disable the default site and enable the new server block:
sudo rm -f /etc/nginx/sites-enabled/default
sudo ln -sf /etc/nginx/sites-available/raff-nginx-demo \
  /etc/nginx/sites-enabled/raff-nginx-demo
Test the complete Nginx configuration before reloading:
sudo nginx -t
Expected output:
nginx: the configuration file /etc/nginx/nginx.conf syntax is ok
nginx: configuration file /etc/nginx/nginx.conf test is successful
Reload Nginx only after the configuration test succeeds:
sudo systemctl reload nginx
Ubuntu’s Nginx configuration guide documents the sites-available and sites-enabled server-block model.
Step 6 — Verify the custom server block
Test the page locally:
curl -s http://127.0.0.1 | grep 'Nginx server block is working on Raff'
Expected output includes:
<h1>Nginx server block is working on Raff</h1>
Test the public response:
SERVER_IP="$(curl -4s https://icanhazip.com)"
curl -I "http://$SERVER_IP"
Expected output includes:
HTTP/1.1 200 OK
Server: nginx
Open the public IP in your browser again:
http://your_server_ip
Visible state check:
The browser shows the custom Nginx server block page.
The page includes the message "Nginx server block is working on Raff".
The page is served from /var/www/raff-nginx-demo/html.
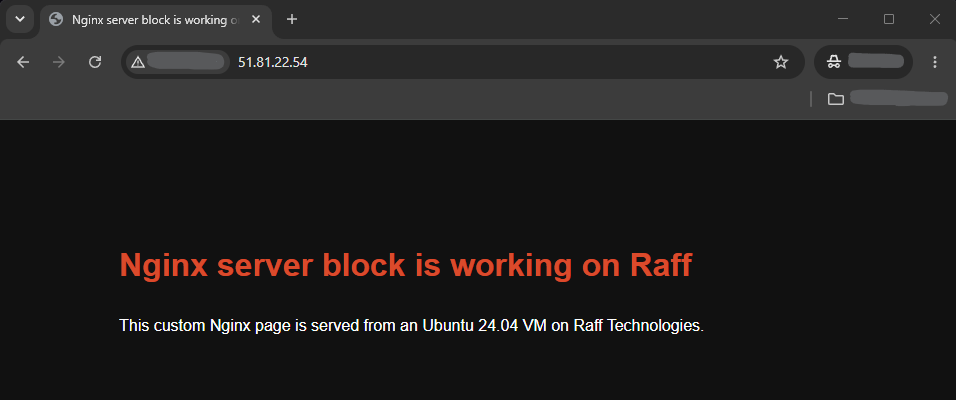
The custom server block works when the command-line request and browser both return the demo page.
📌 Production note: Replace
server_name _;with your real domain names before enabling HTTPS. Only the public Nginx edge should be internet-facing; application servers, databases, caches, and internal services should use private traffic paths where possible. See Public vs Private Traffic in Cloud Infrastructure.
Step 7 — Review Nginx files and logs
Important Nginx paths on Ubuntu include:
/etc/nginx/nginx.conf
/etc/nginx/sites-available/
/etc/nginx/sites-enabled/
/etc/nginx/conf.d/
/var/www/
/var/log/nginx/
Files created by this tutorial:
/var/www/raff-nginx-demo/html/index.html
/etc/nginx/sites-available/raff-nginx-demo
/etc/nginx/sites-enabled/raff-nginx-demo
/var/log/nginx/raff-nginx-demo.access.log
/var/log/nginx/raff-nginx-demo.error.log
Review recent access requests:
sudo tail -n 20 /var/log/nginx/raff-nginx-demo.access.log
Review recent errors:
sudo tail -n 20 /var/log/nginx/raff-nginx-demo.error.log
Confirm which configuration files Nginx loaded:
sudo nginx -T 2>/dev/null | grep -E 'configuration file|server_name|root '
Use nginx -T carefully on shared systems because the complete output can include internal hostnames and configuration details.
Step 8 — Verify the complete Nginx setup
Run the final verification sequence:
SERVER_IP="$(curl -4s https://icanhazip.com)"

echo "Service:"
systemctl is-active nginx

echo "Boot status:"
systemctl is-enabled nginx

echo "Configuration:"
sudo nginx -t

echo "Firewall:"
sudo ufw status numbered

echo "Local HTTP response:"
curl -I http://127.0.0.1

echo "Public HTTP response:"
curl -I "http://$SERVER_IP"

echo "Custom page:"
curl -s http://127.0.0.1 | grep 'Nginx server block is working on Raff'
Expected output includes:
active
enabled
nginx: configuration file /etc/nginx/nginx.conf test is successful
Status: active
HTTP/1.1 200 OK
Nginx server block is working on Raff
The setup is complete when the service is active and enabled, the configuration test passes, UFW allows HTTP traffic, and both local and public requests return the custom page.